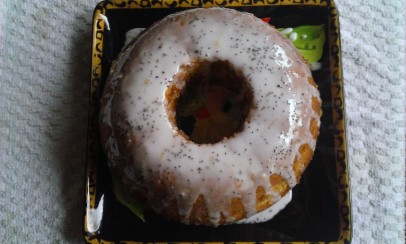
Lemon and Poppy Seed Cake


lemon 2


I made this a few weeks when some family friends came to visit us from London. I wanted to bake something which wouldn’t be too heavy or sickly as we were going out for a meal shortly afterwards; I’m happy to say that this fit the bill perfectly. This cake is made with egg whites and less butter than you would usually use in a cake, which makes it wonderfully light and airy. You don’t have to put the glaze on if you’d prefer it too be less sweet, but it does make the cake look more appetising.

This is another Hummingbird recipe and serves about 12-16 people.

Ingredients

85g unsalted butter

245g caster sugar

grated zest of 1 1/2 lemons

15g poppy seeds (plus extra to decorate)

165ml whole milk

235g plain flour

2 teaspoons baking powder

1/2 a teaspoon of salt

3 egg whites

For the lemon syrup:

juice and zest of 1 lemon

50g caster sugar

For the glaze:

Juice of 1 lemon

250g icing sugar


lemon 3


Recipe

Preheat the oven to 170°C and grease and dust your ring mould with flour.

Cream together the butter, caster sugar, poppy seeds and lemon zest in a large bowl. Slowly add the milk and beat well – it’s perfectly normal for it to look slightly split at this stage.

In a separate bowl, sieve the flour, salt and baking powder, then add to the butter mixture in three stages, beating well after each addition.

In a separate bowl, beat the egg whites until they form stiff peaks and fold gently into the mixture.

Pour the mixture into the mould and bake for 30-35 minutes or until golden on top. The sponge will bounce back when pressed once it is done.

Whilst the cake is cooking, heat the sugar, lemon juice and lemon zest in a saucepan until boiling and reduce to a thin syrup.

When the cake is cooked, prick the top with a fork all over and pour the syrup over it – this what makes the cake so moist. Leave the cake to cool for a while before turning out onto a wire rack.

Make the icing whilst the cake is cooling by mixing the icing sugar and lemon juice together until smooth and glossy. Once it has cooled, spoon over the glaze over the cake and let it run down the sides. Sprinkle with a few poppy seeds.
 

lemon 1


Red Velvet Whoopie Pies

After stumbling across and ordering a whoopie pie tin on Amazon (whilst looking for hair curlers…yeah, I don’t know how that happened either), I’ve been dying to try this recipe out. I would stress the importance of not overfilling the holes if you do use a tin; if you do, as I did, you won’t end up with these:

whoopie 2

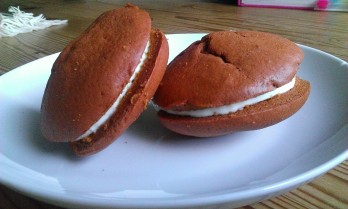
You’ll have yourself a few of these brutes:

whoopie 3     whoopie 4

Aren’t they pretty?

This recipe is from the Hummingbird Bakery’s Cake Days, but I used this Betty Crocker filling recipe rather than the one provided in the book.

Ingredients

For the sponge:

120g unsalted butter, softened

200g soft dark brown sugar

1 large egg

120ml buttermilk (if you don’t have buttermilk, just add 1 tsp lemon juice to this quantity of milk and leave to stand for five minutes before use)

1 tsp vanilla essence

340g plain flour

2 tbsp cocoa powder

1/2 tsp bicarbonate of soda

30ml red food colouring (do not, I repeat, DO NOT use ‘natural’ food colouring as it will not be strong enough to produce the red that you want for red velvet)

For the filling:

170g cream cheese

90g unsalted butter

1 tsp vanilla essence

120g icing sugar

Recipe

Preheat the oven to 170°C and line two baking sheets with greaseproof paper.

Using a handheld electric whisk, cream the butter and sugar together until light and fluffy in texture. Add the egg whilst mixing on a low speed and whisk until fully incorporated.

Mix the buttermilk and vanilla essence together by hand, then pour into the creamed mixture whilst mixing on a low speed. Sift the flour, cocoa powder, bicarbonate of soda and salt together and add to the batter in two batches, mixing thoroughly after each addition. Add the red food colouring and increase the speed before giving the batter a final mix to ensure an even red colour throughout. Refrigerate the batter for 20-30 minutes to allow it to cool and set slightly.

Once cooled, spoon or pipe the batter onto the prepared trays (you’ll probably get eight to ten mounds per tray, each being about 3-5cm across and 2-3cm apart). Bake for 10-13 minutes or until springy to touch, then allow to cool completely.

While the sponges are baking, make the filling. In a bowl, beat the cream cheese, butter and vanilla on a low speed until fully combined. Add the powdered sugar bit by bit until all is incorporated. Beat for 1 minute. Be careful not to overbeat as the cream cheese can quickly cause the mixture to become runny, which is not what we want. Place the filling in the fridge until you’re ready to use it.

Once the cakes are completely cooled, spread about a tablespoon of filling onto the flat side of one of the sponges, then stick a sponge of similar size on top of it. Repeat with the remaining sponges and filling.

whoopie 1